This page is the web version of the original CASSIE user manual. It covers the full user workflow,
from account creation and storage uploads to pipeline publishing and troubleshooting.
CASSIE is a cloud-native platform for genomics workflows. It allows researchers to upload genomic data,
configure analyses through guided UI selections, translate user-defined settings into reproducible
Nextflow workflows, execute jobs on scalable Kubernetes infrastructure, and share successful workflows
with the community without manually managing servers or containers.
Section 2
Getting Started
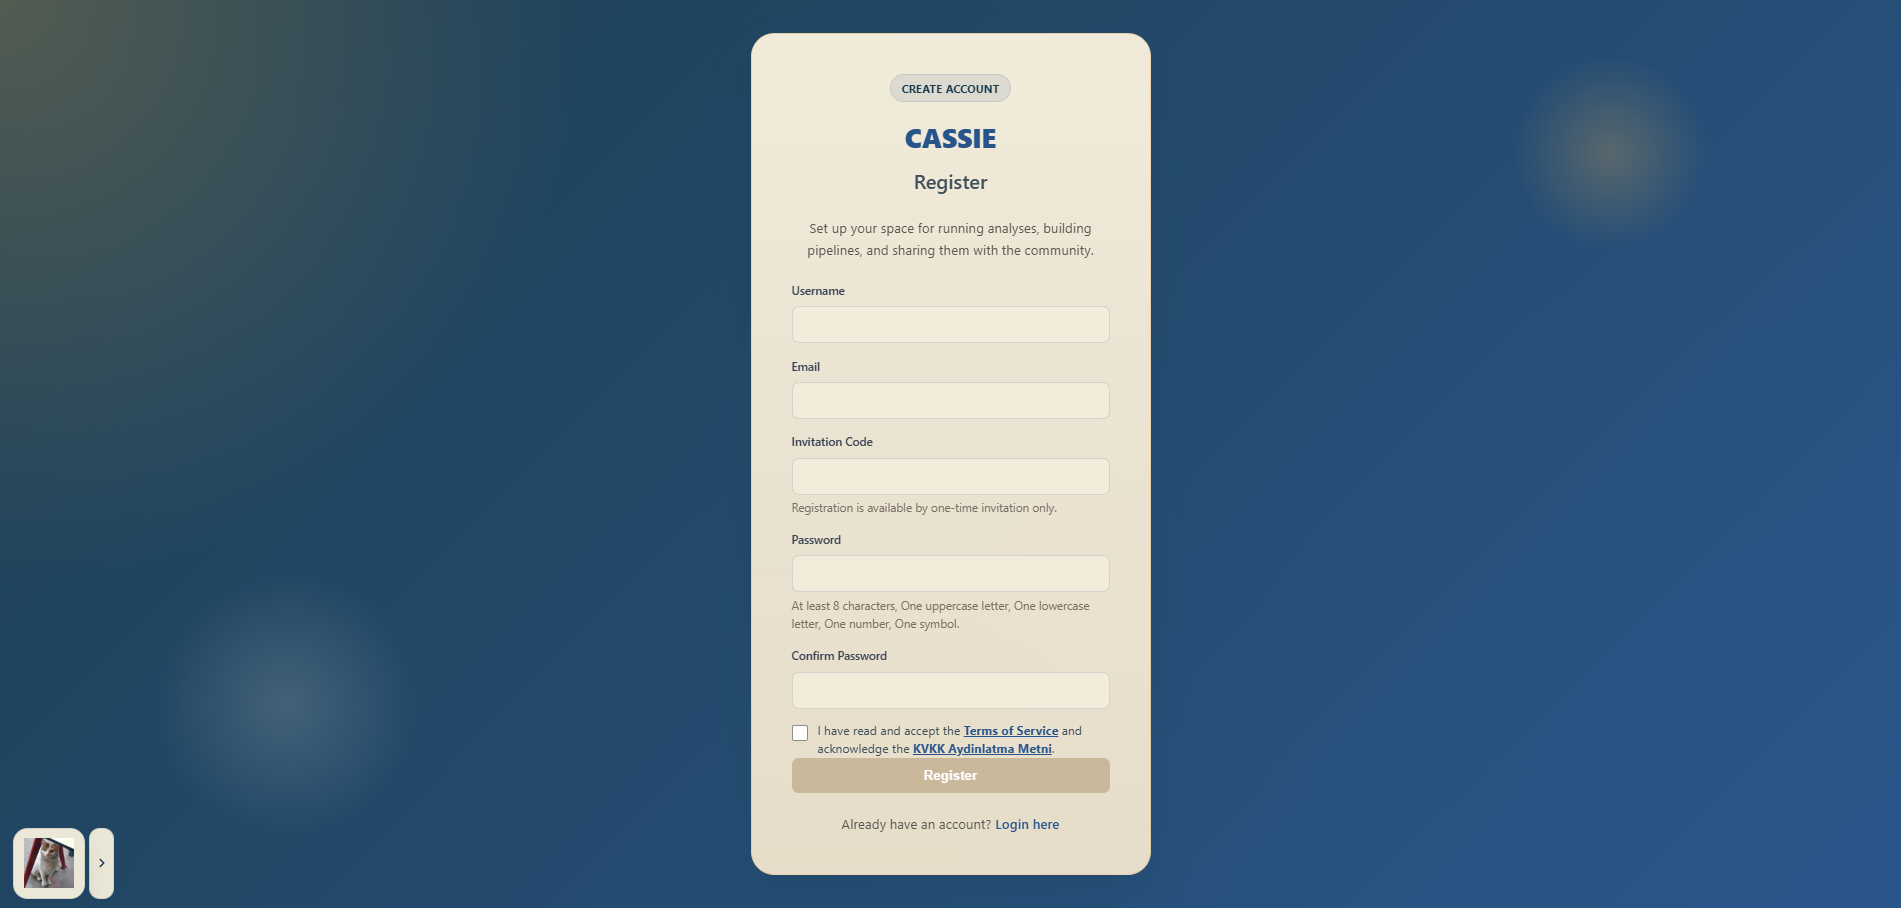
2.1 Registering an Account
Open CASSIE in your web browser.
Click "Register" or "Sign Up" on the landing page.
Fill in your name, email address, and choose a password.
Check your inbox for a verification email and click the confirmation link.
After verification, you will be redirected to the login page.
Registering a new account in CASSIE.
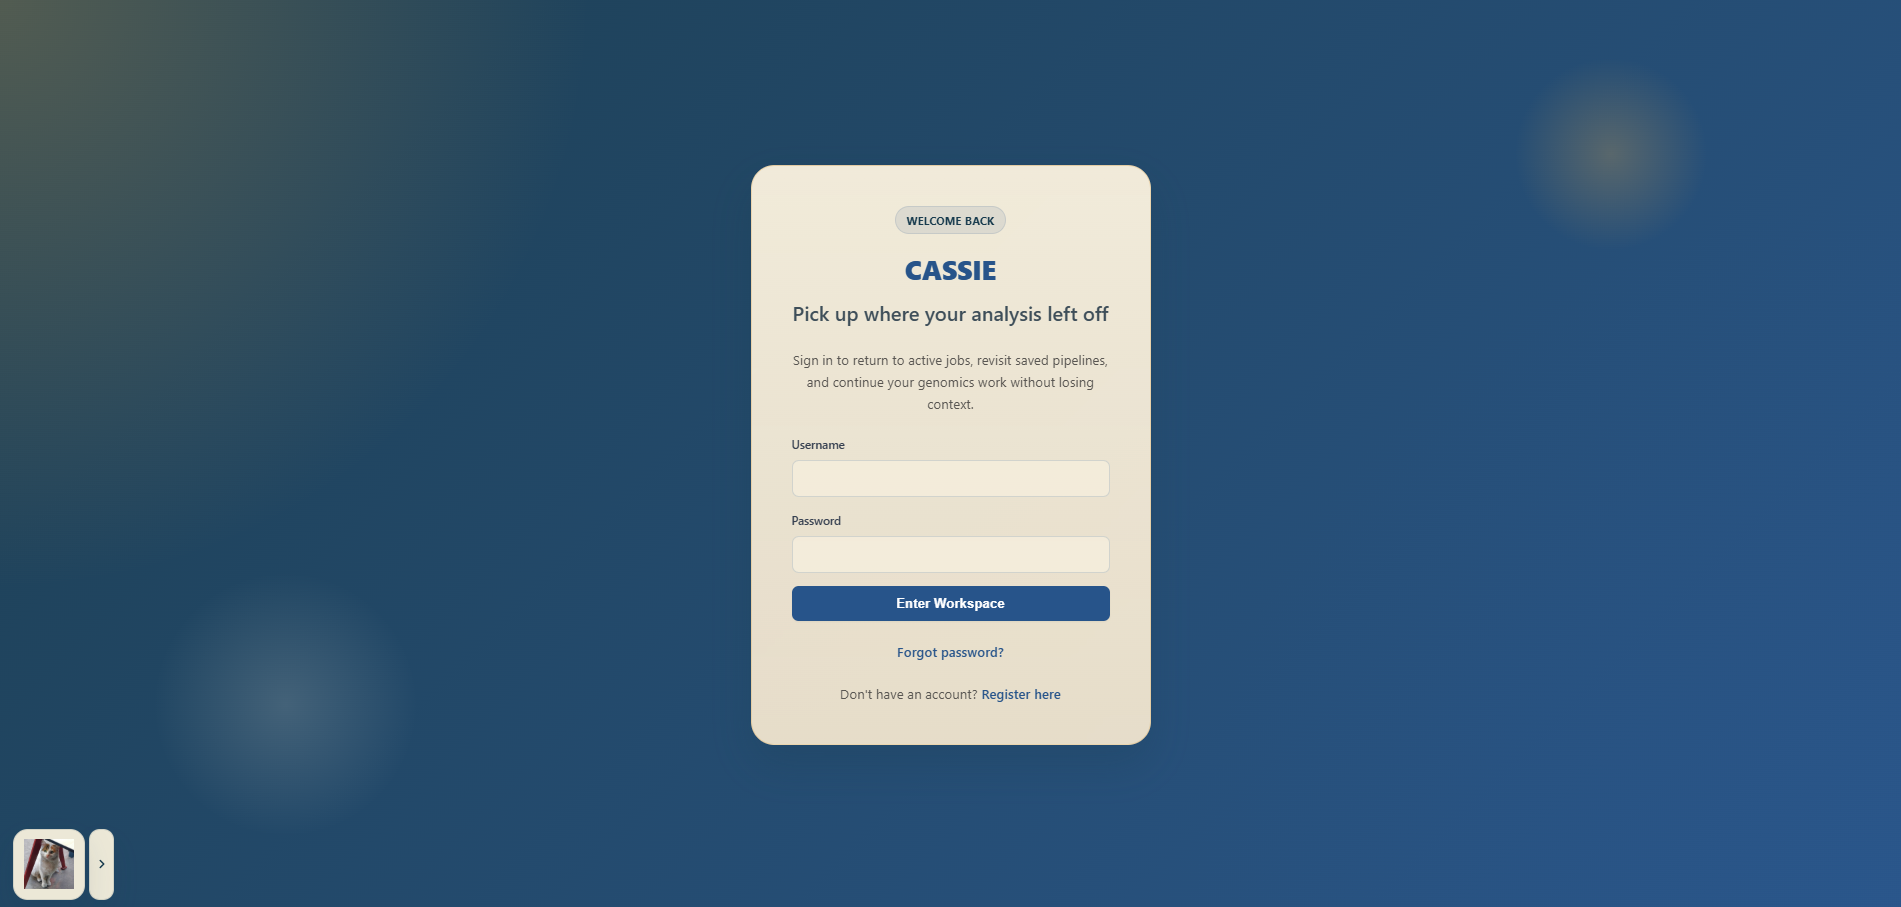
2.2 Logging In
Go to the CASSIE login page.
Enter your registered email and password.
Click "Log In" to open the Home dashboard.
If you forget your password, use the "Forgot Password" link on the login page to request a reset email.
Logging in to the platform.
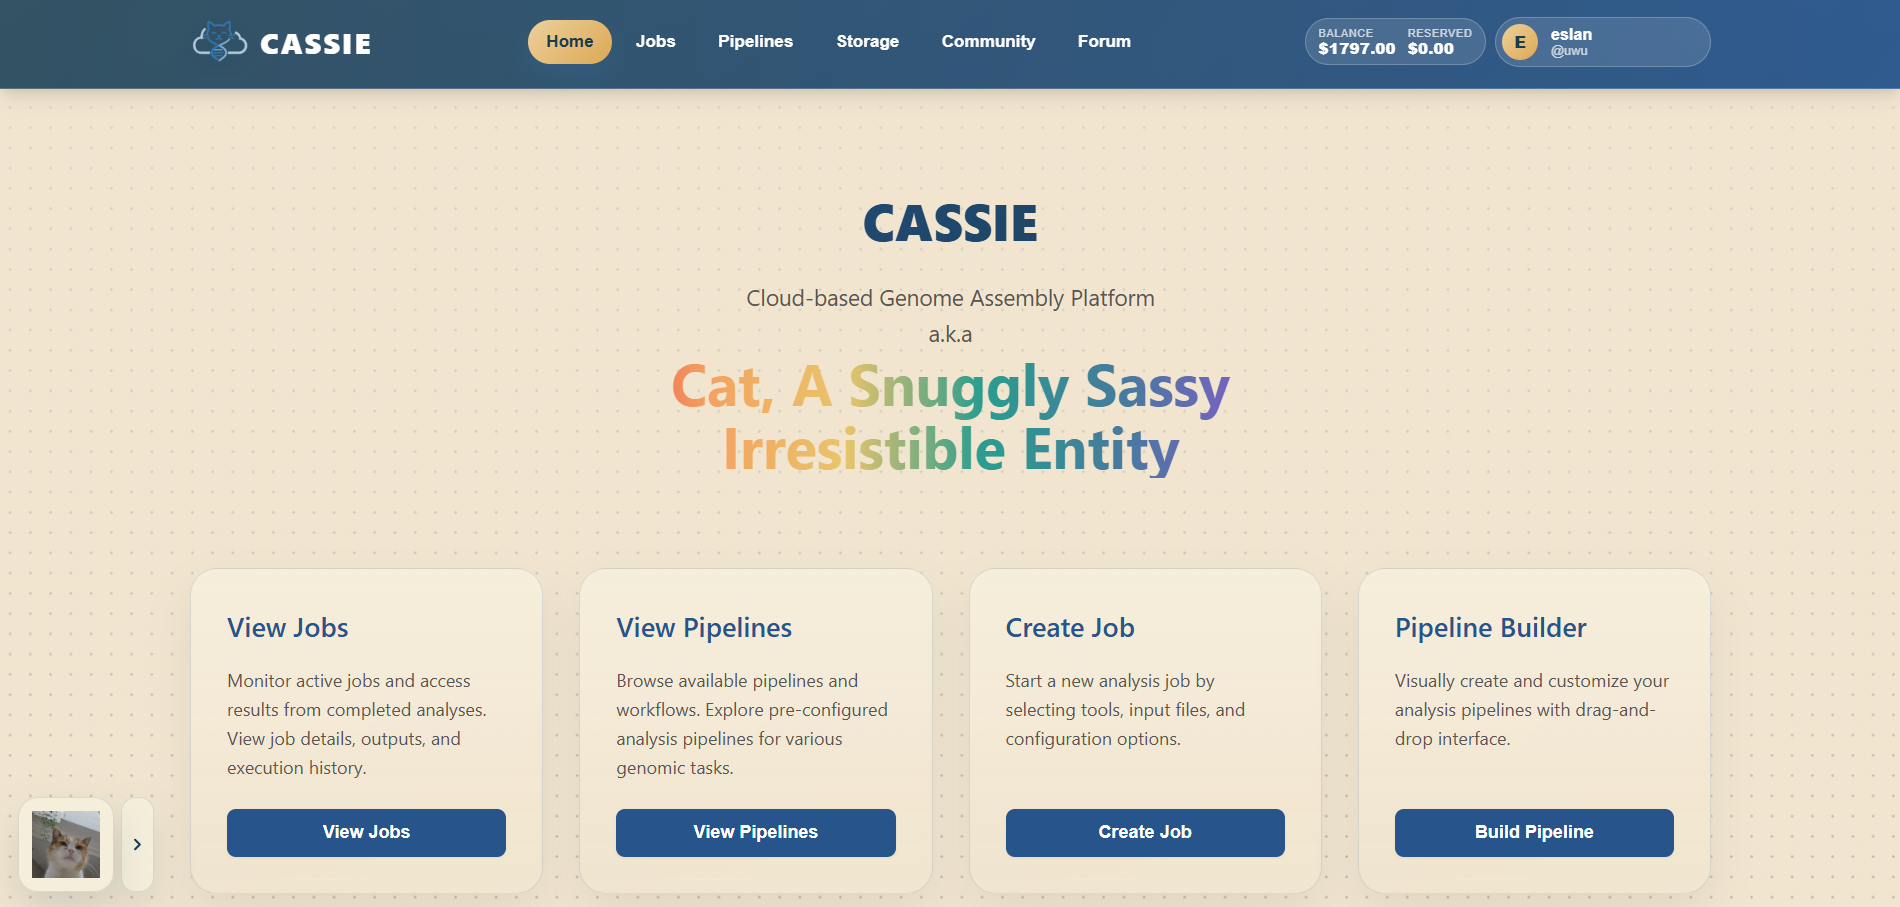
2.3 Navigating the Interface
The main navigation bar runs across the top of the application. Depending on whether you are signed in,
you will typically see the following links and controls:
Home: Your dashboard and main starting point.
Jobs: History of all jobs you have run.
Pipelines: Manage your saved workflows and starter templates.
Storage: Manage uploaded inputs and generated outputs after signing in.
Community: Browse shared pipelines published by other users.
Forum: Read and create discussion threads.
Balance: Review available and reserved funds for job execution.
Account Menu: Open your profile and account actions.
The Home page also provides shortcut cards for viewing jobs, opening pipelines, creating a job, and
launching the pipeline builder.
Main CASSIE interface and navigation.
Section 3
Storage
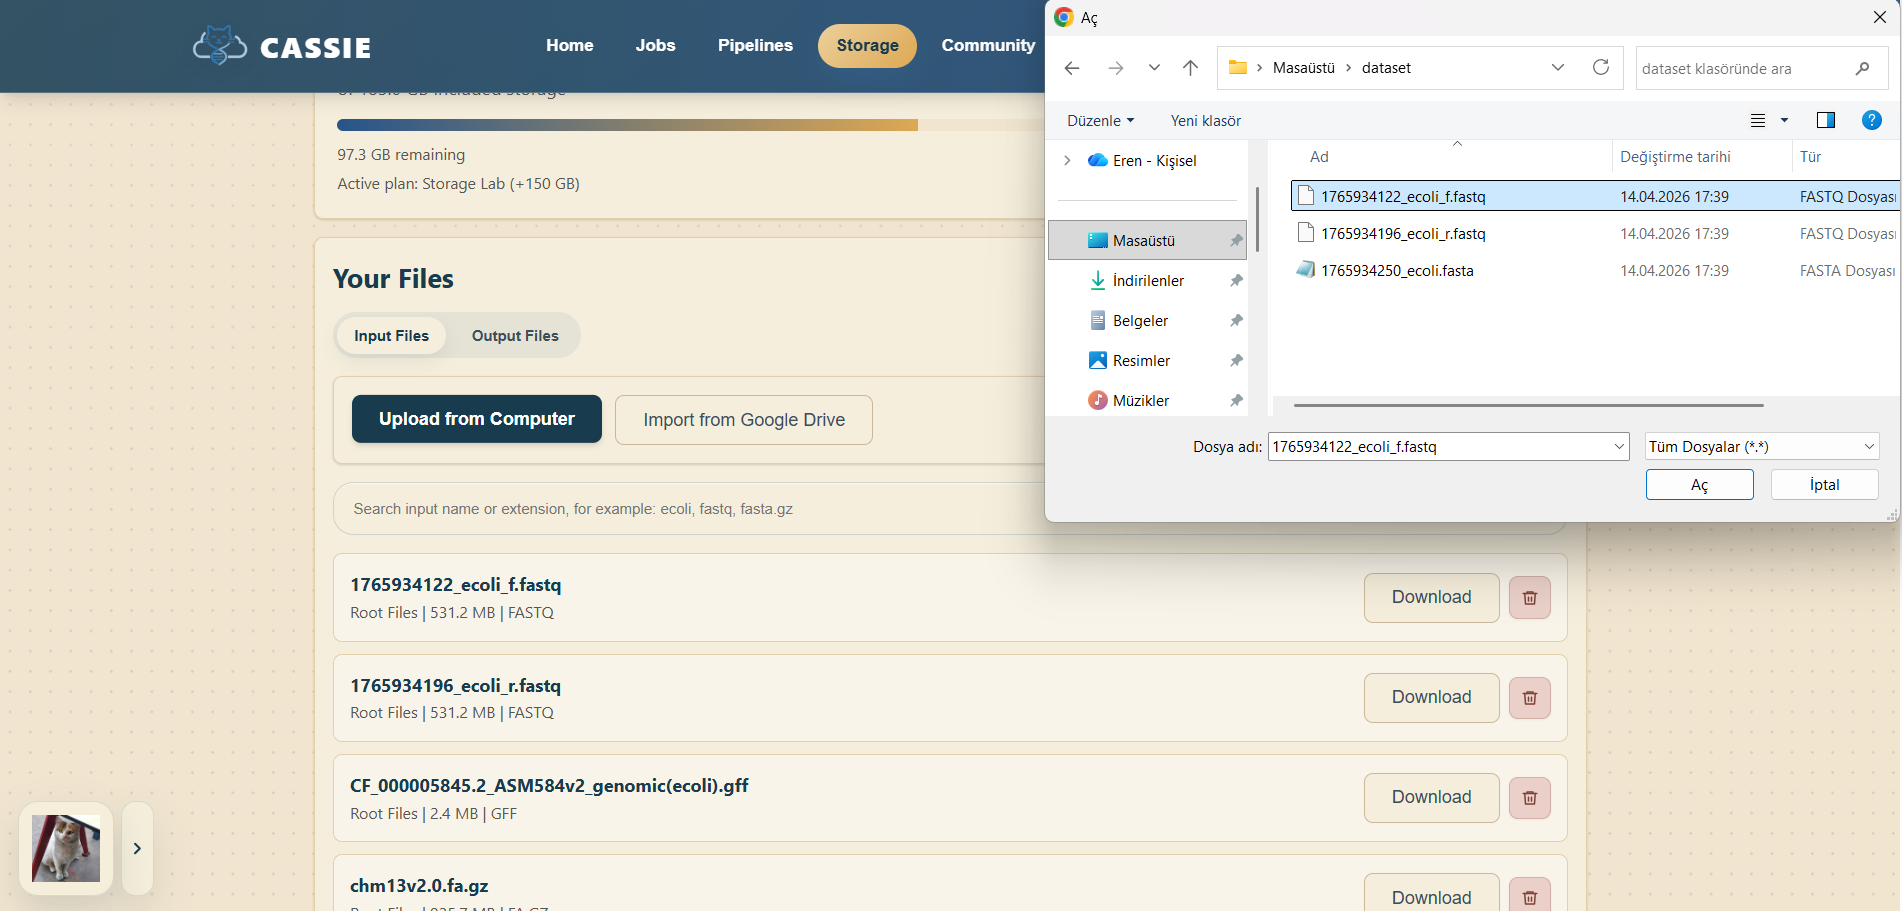
3.1 Uploading Files
Click "Storage" in the navigation menu.
Select the Input Files tab if it is not already active.
Click "Upload from Computer" to choose local files, or use the Google Drive import option if it is configured.
Select one or more files from your computer.
Wait for the upload queue to finish and for the files to appear in the storage library.
Confirm that the uploaded file appears in your input file list.
Uploading genomic files into Storage.
3.2 Supported File Formats
CASSIE recognizes the following common genomic and workflow-related file formats:
Additional supported formats include .gtf, .hal, .gfa, .csv, .tsv, .json, and .txt, including supported compressed variants.
If CASSIE does not automatically detect a file format, you can set it manually using the override
format option next to the file.
Section 4
Running a Job
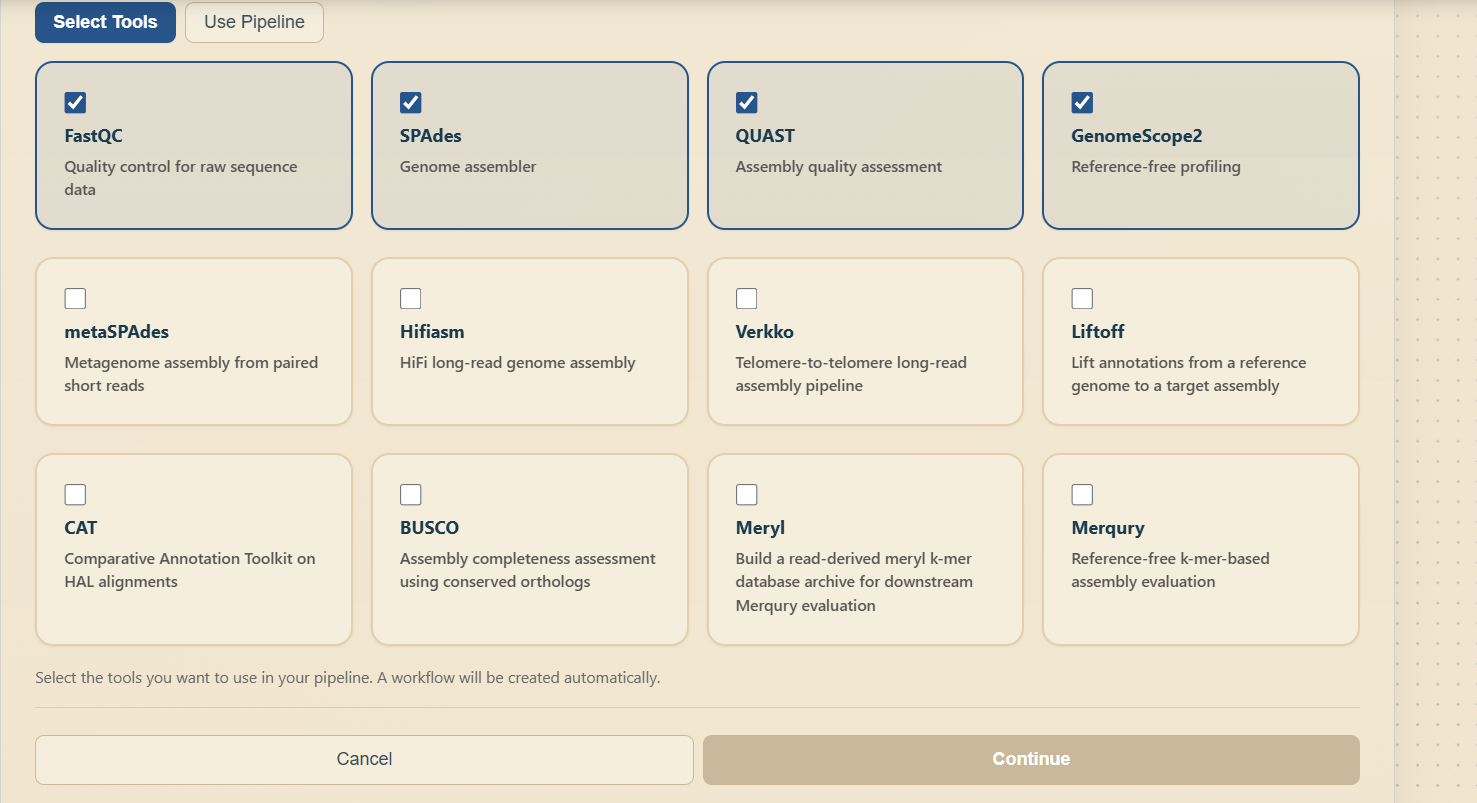
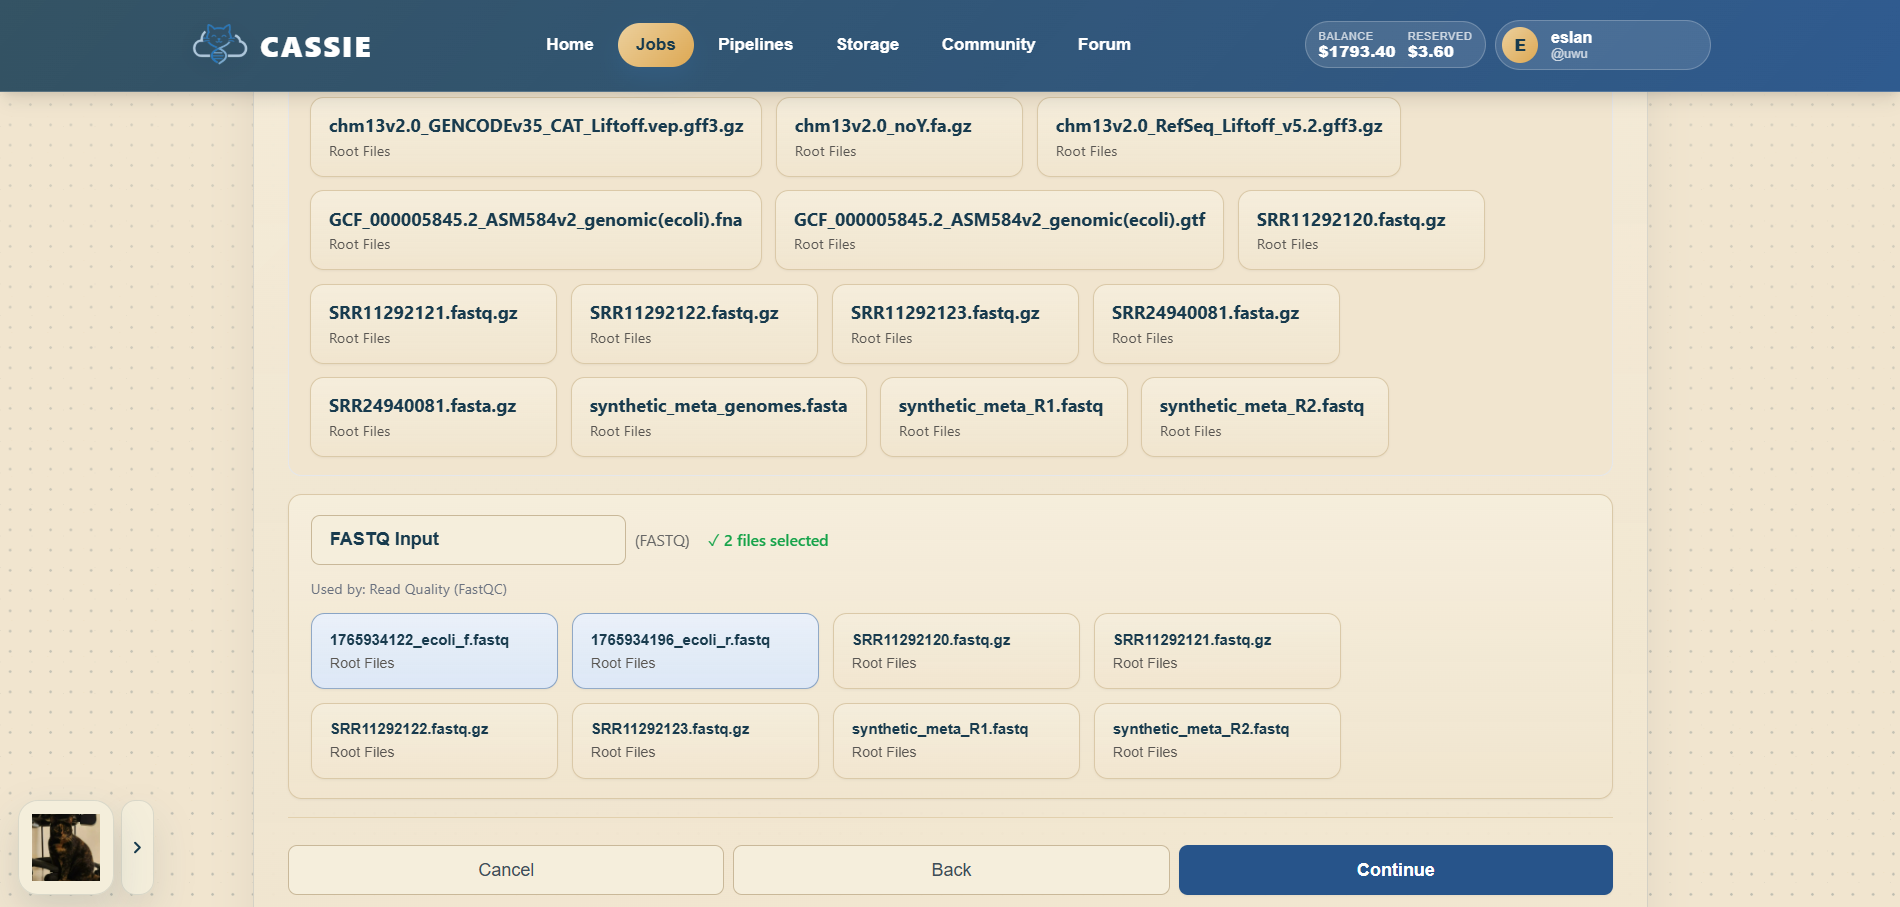
4.1 Creating a One-off Job
Open the Create Job flow from the Home page shortcut or from a pipeline action such as "Use in Job".
Select the desired bioinformatics tool from the tool dropdown.
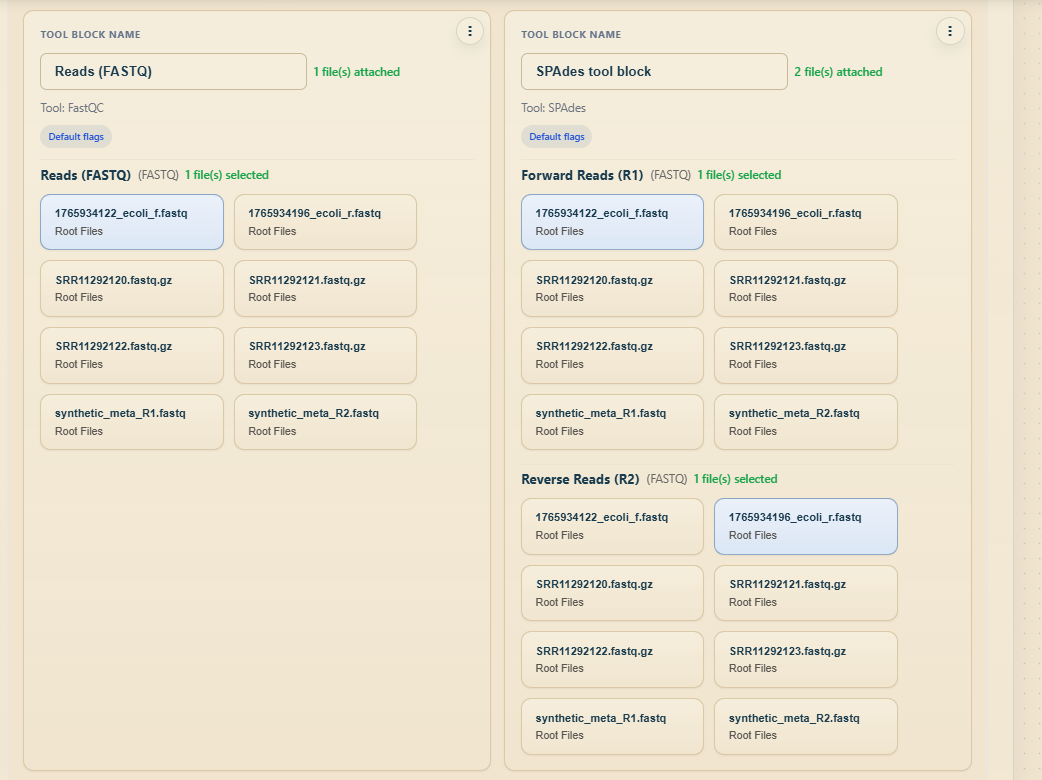
Under input files, add the file or files required by the selected tool.
Review the estimated runtime and cost shown on the page.
Click "Submit Job" to queue the job for execution.
Starting a one-off job.Selecting inputs and tool settings.Reviewing the job before submission.
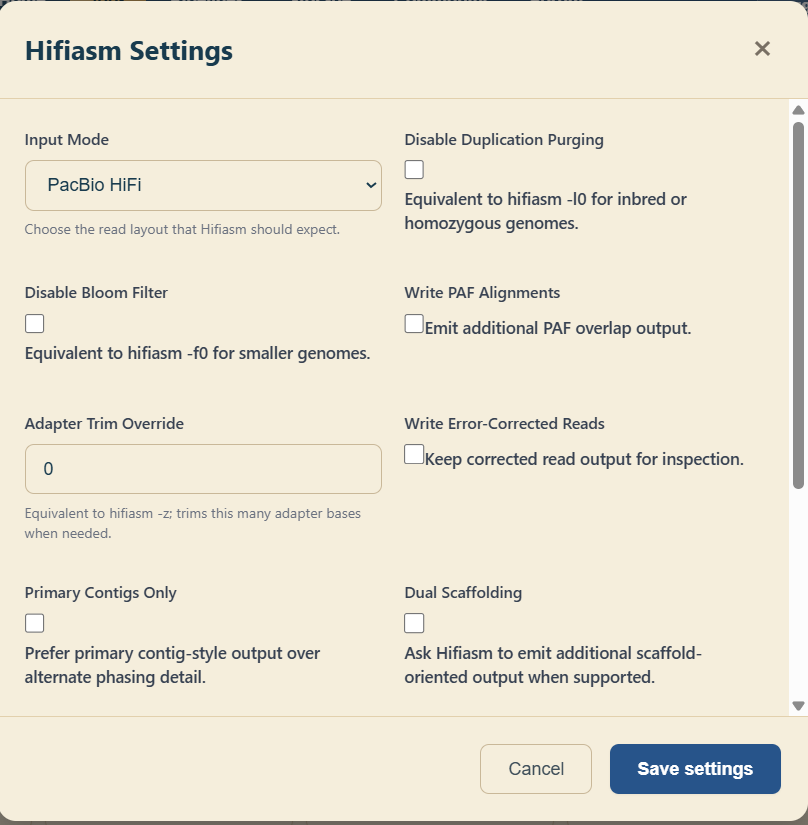
4.2 Configuring Tool Parameters
Most tools expose optional parameters below the file picker. Common examples include genome size,
coverage depth, or output format flags. Hover over parameter labels to view short descriptions.
Leave fields blank to use the default tool settings.
Configuring optional tool parameters.
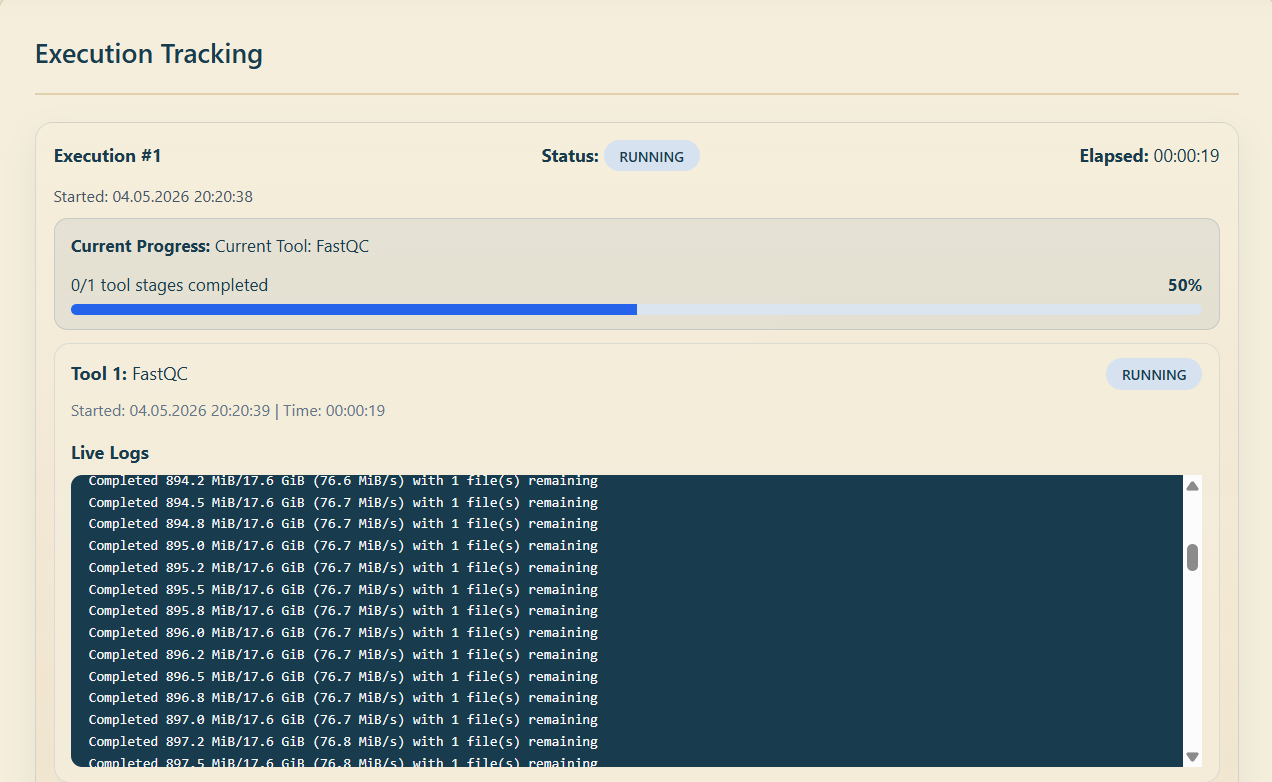
4.3 Monitoring Job Progress
Open the "Jobs" page from the navigation menu.
Click a job row to open its detail view.
Review the current status, the stage-by-stage progress indicator, and the live log output.
If a job fails, review the error summary and use the retry option if available.
Tracking status and logs for a running job.
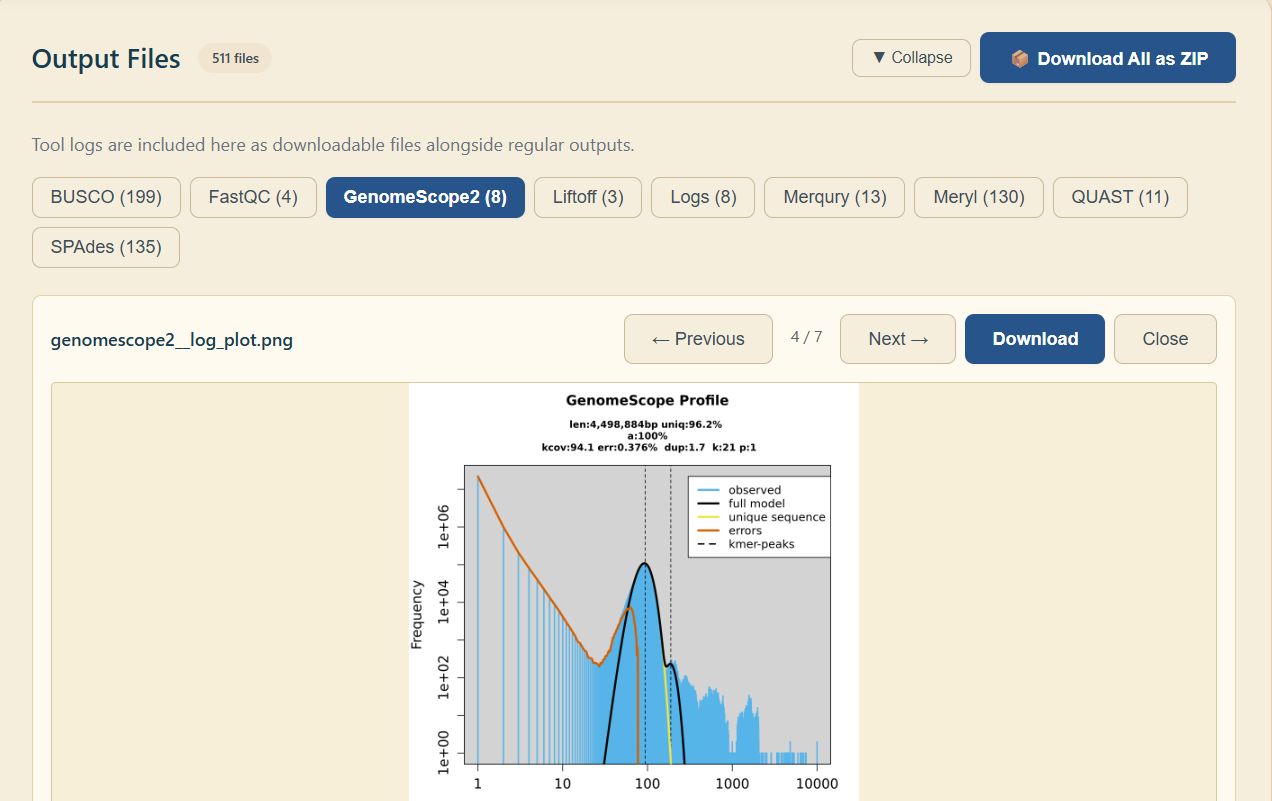
4.4 Downloading Results
Once the job reaches Completed status, scroll to the outputs section.
Download files one by one or use the "Download All" option to retrieve everything as a ZIP archive.
Downloading generated outputs from a completed job.
Section 5
Pipeline Builder
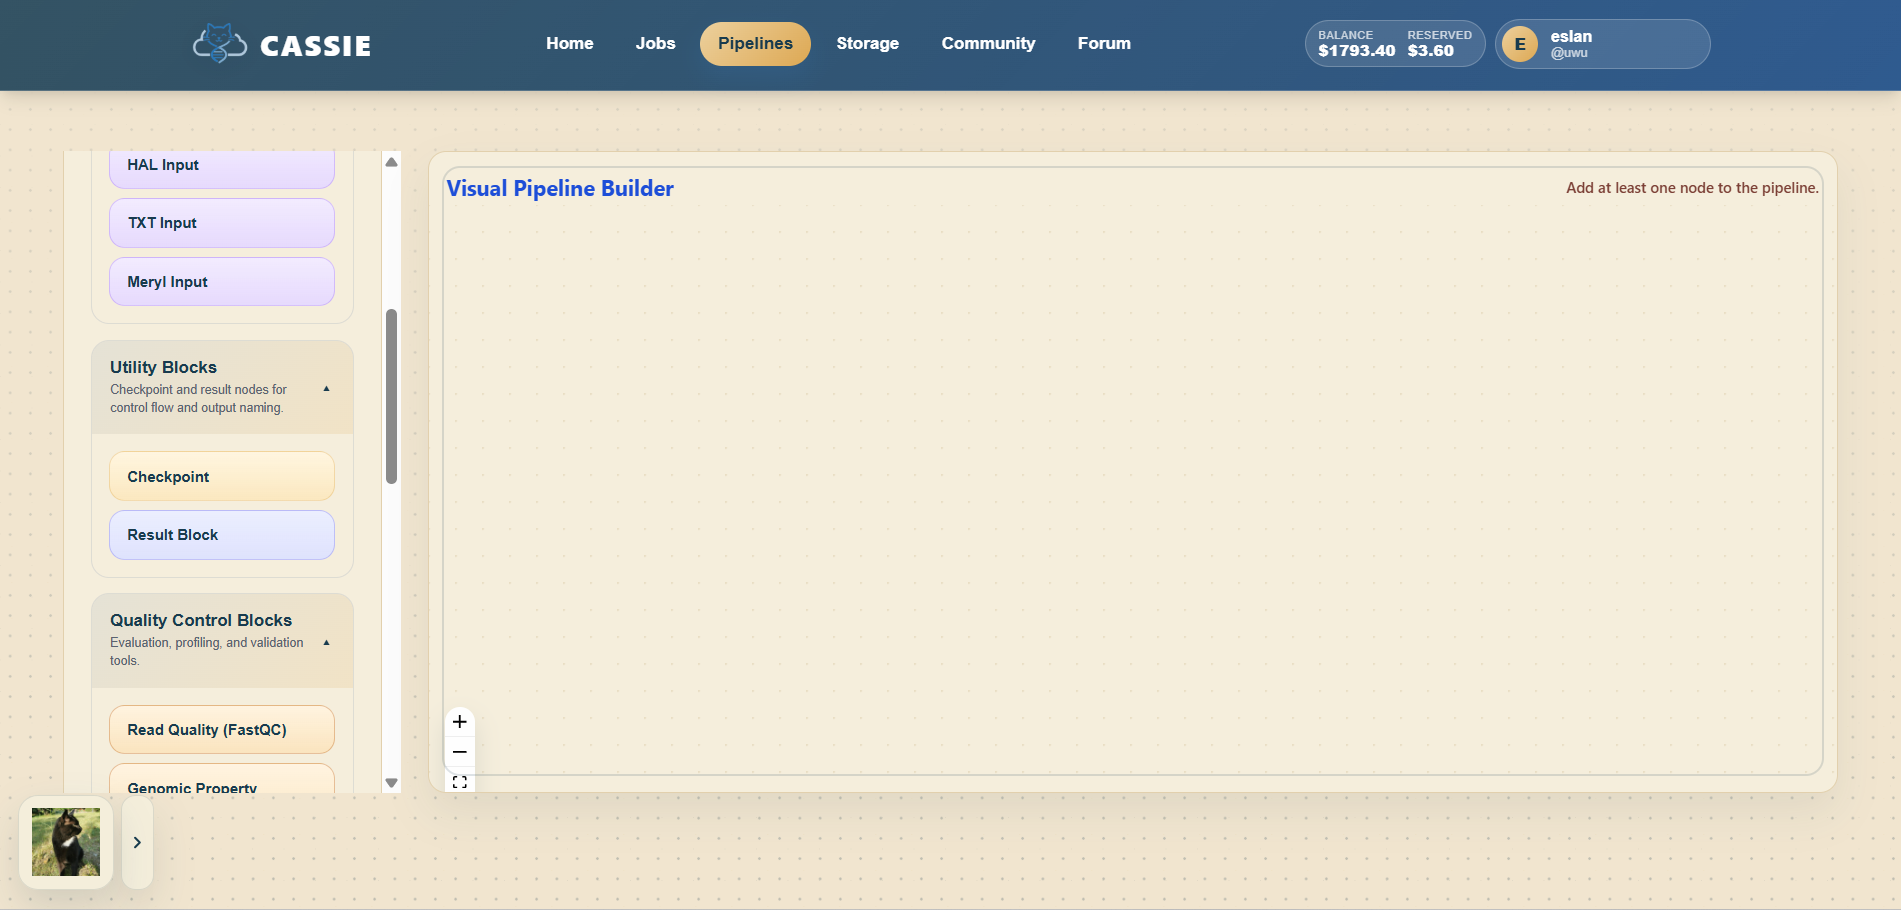
5.1 Creating a New Pipeline
Open the builder from the Home page shortcut or from the Pipelines page using "Create New Pipeline".
If no pipeline is open yet, start with a blank pipeline canvas.
Enter a name for the new pipeline when prompted.
Creating a new pipeline.
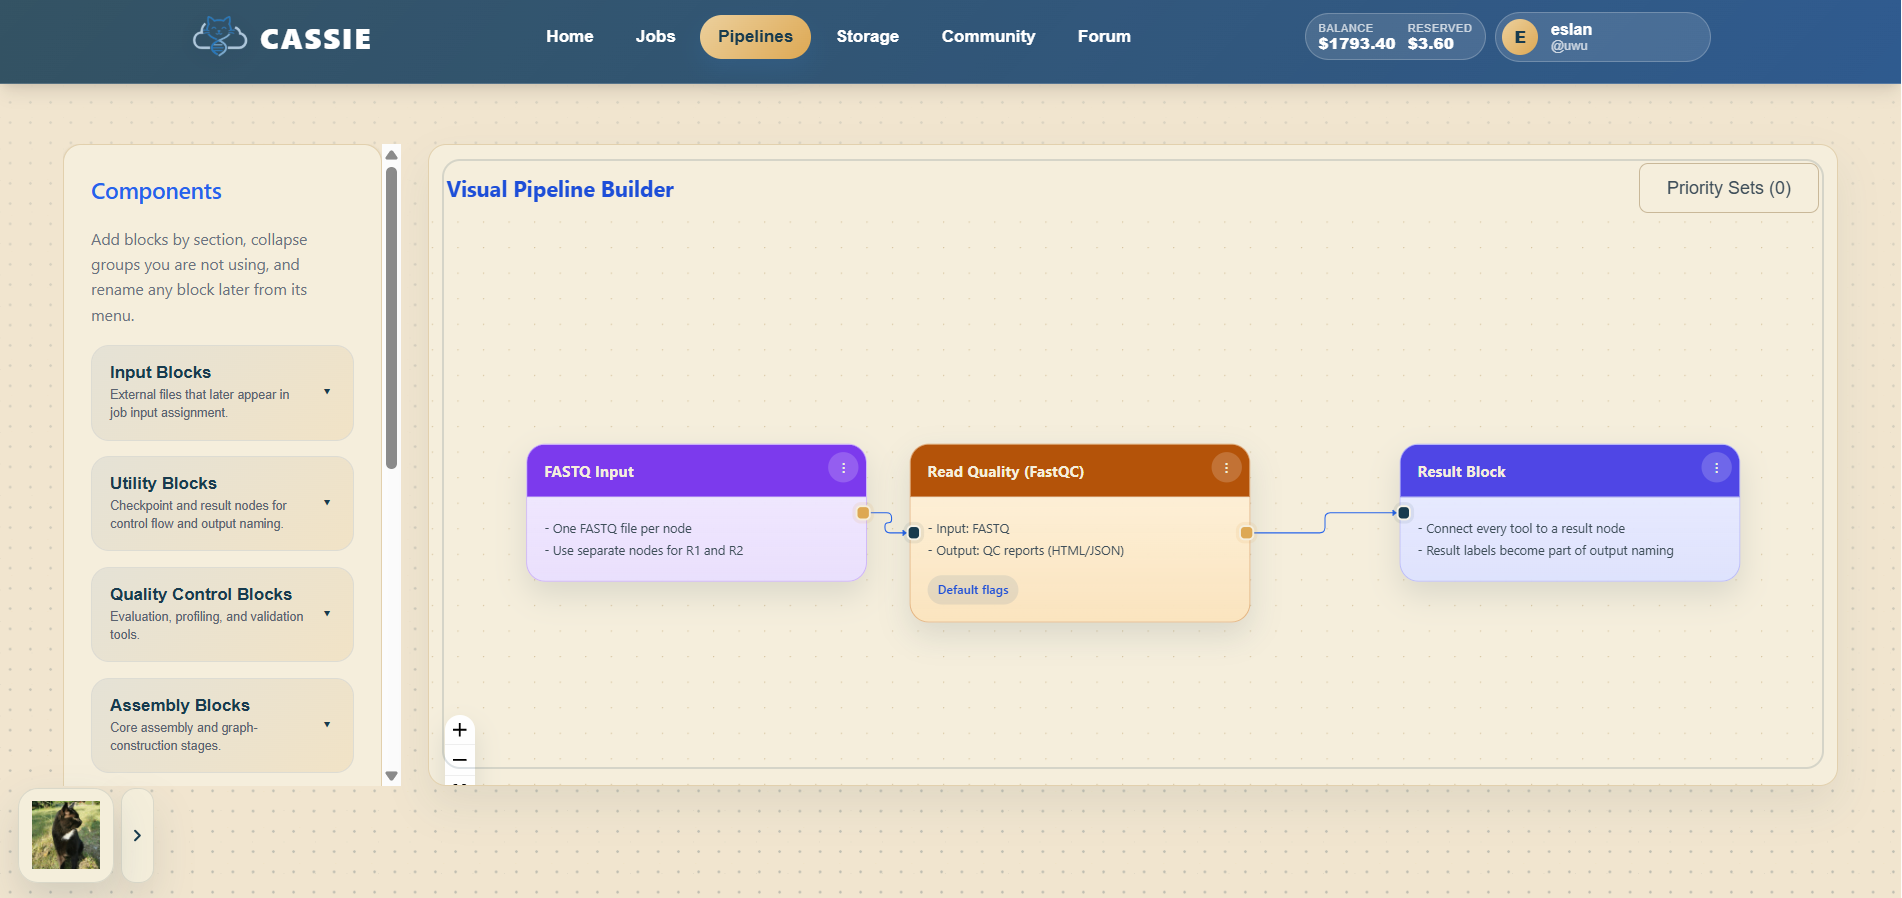
5.2 Adding and Connecting Nodes
The builder canvas supports several node types:
Input: Represents an uploaded file from Storage.
Tool: A bioinformatics processing step.
Checkpoint: A pause point for manual review.
Result: Marks the final output of the pipeline.
To build a pipeline, add an input node, place a tool node beside it, connect output handles to input
handles, continue linking tools in sequence, and finish with a result node.
Building and connecting pipeline nodes.
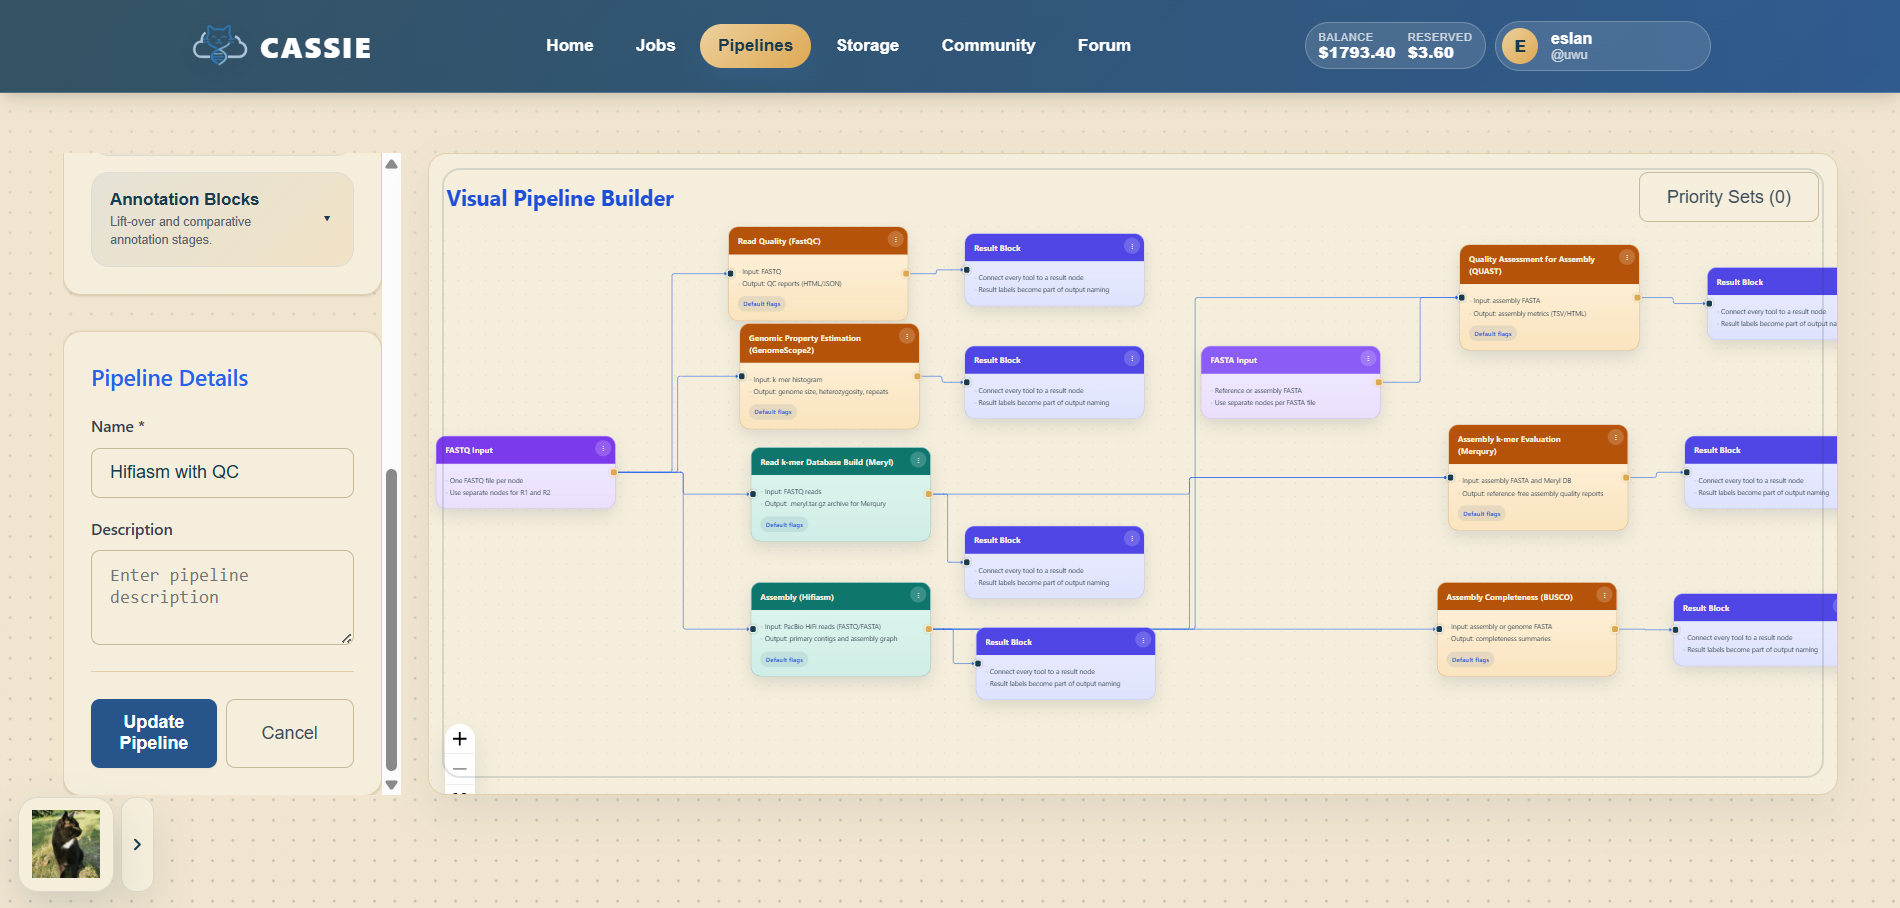
5.3 Saving and Naming Pipelines
Click the Save button in the toolbar whenever you want to preserve your work.
Rename a pipeline by editing the title shown at the top of the builder.
Clone an existing pipeline through the pipeline menu if you want to reuse and modify it.
Saving and naming your pipeline.
5.4 Running a Pipeline Job
Open an existing pipeline in the builder or from your Pipelines page.
Click "Run Pipeline".
Map each input node to a file from Storage.
Submit the pipeline run and verify that it appears in your Jobs list.
Launching a pipeline job.
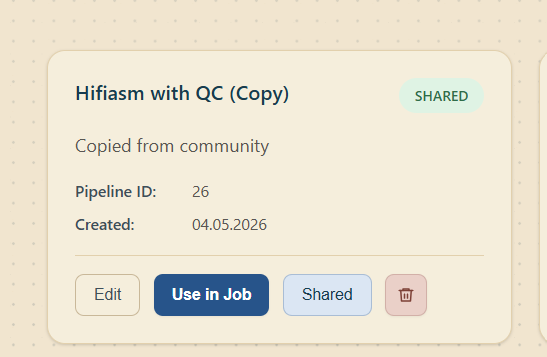
5.5 Publishing a Pipeline to the Community
Open the Pipelines page to see your saved pipelines.
Find the pipeline you want to share and use the Share action on its card.
After sharing, the pipeline is marked as Shared in your own pipeline list.
Open the Community page to confirm that the shared pipeline is visible to other users.
A pipeline marked as shared in your personal pipeline list.The Community page after shared pipelines become visible.
Section 6
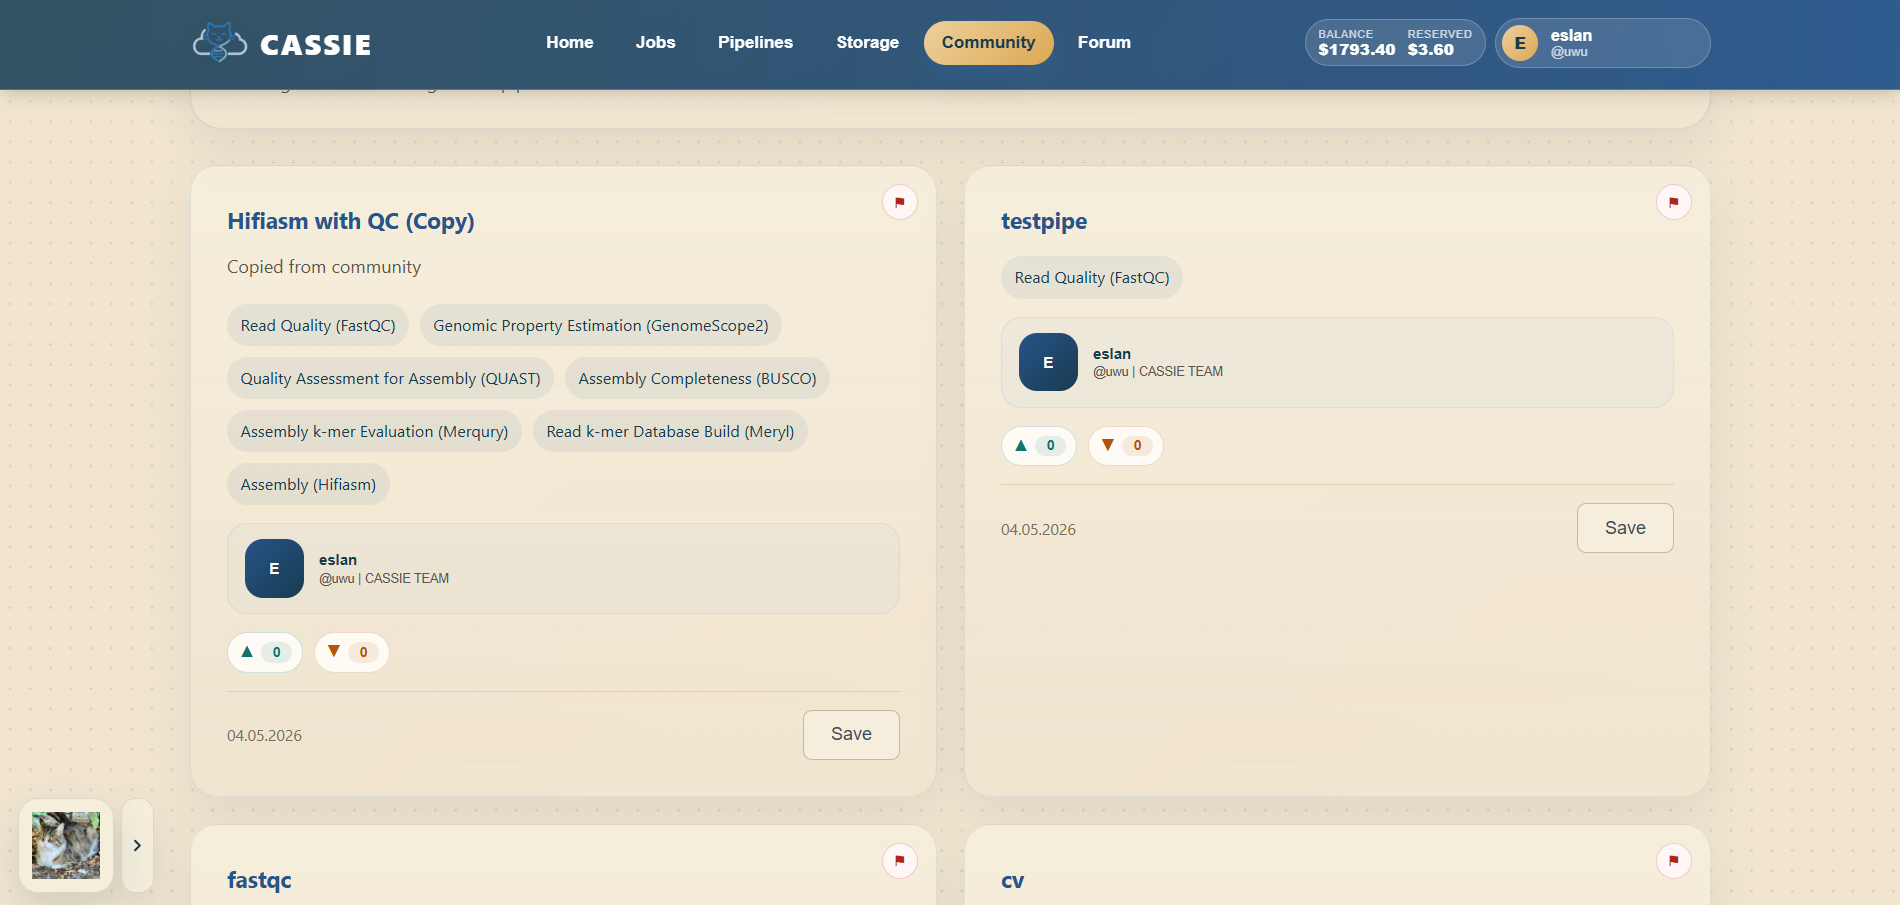
Community Library
The Community page is where you browse workflows shared by other users.
You can search by name, sort by most recent or most popular, filter by tool labels, open a shared
pipeline in the builder, and save a copy into your own account for later editing or execution.
Browsing shared pipelines in the Community library.
Section 7
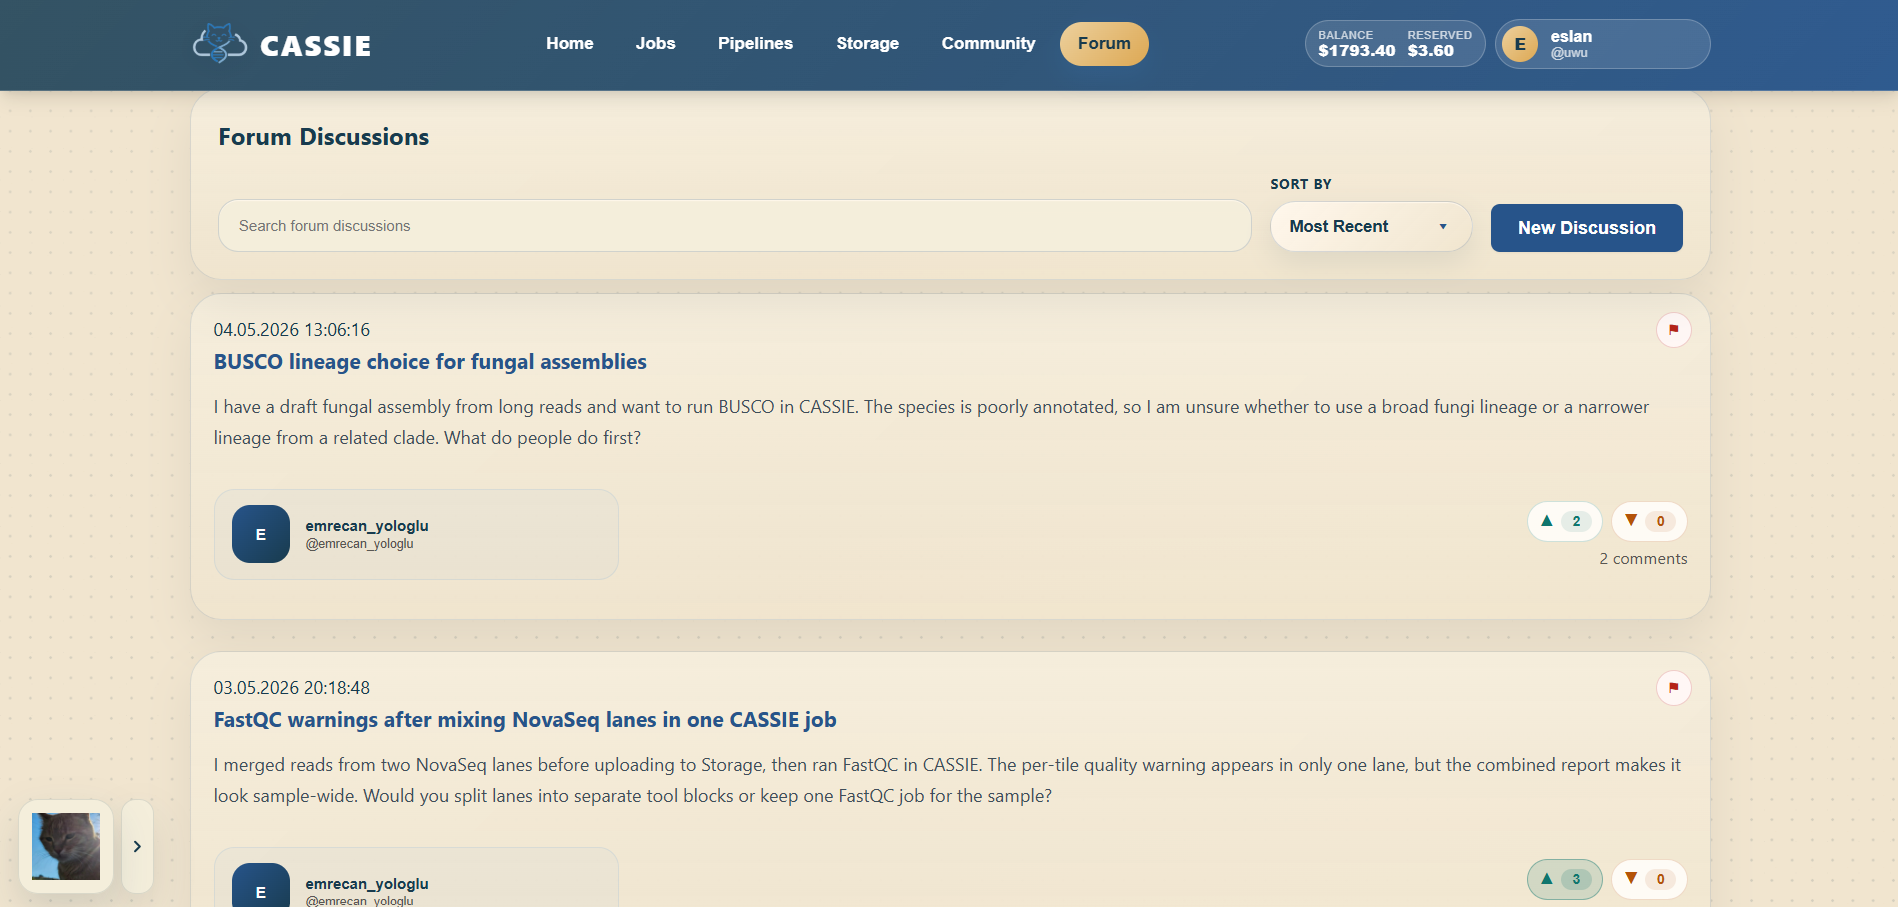
Community Forum
The Forum is used to share results, discuss workflows, and ask questions.
Browse posts on the main forum page.
Open a post to read details and replies.
Create a new post to start a discussion, share a pipeline, or report a result.
Use search to find posts by keyword or tag.
Forum browsing and discussion features.
Section 8
Profile & Account Settings
Use the Profile page to manage your public information, security settings, and account controls.
View and edit your display name, email, bio, affiliation, job title, location, website, and avatar.
Enable or disable login verification and job notification emails after your email is verified.
Change your password separately from your public profile details.
Review pipelines you have shared to the community catalog.
Request and confirm account deletion with an emailed verification code.
Section 9
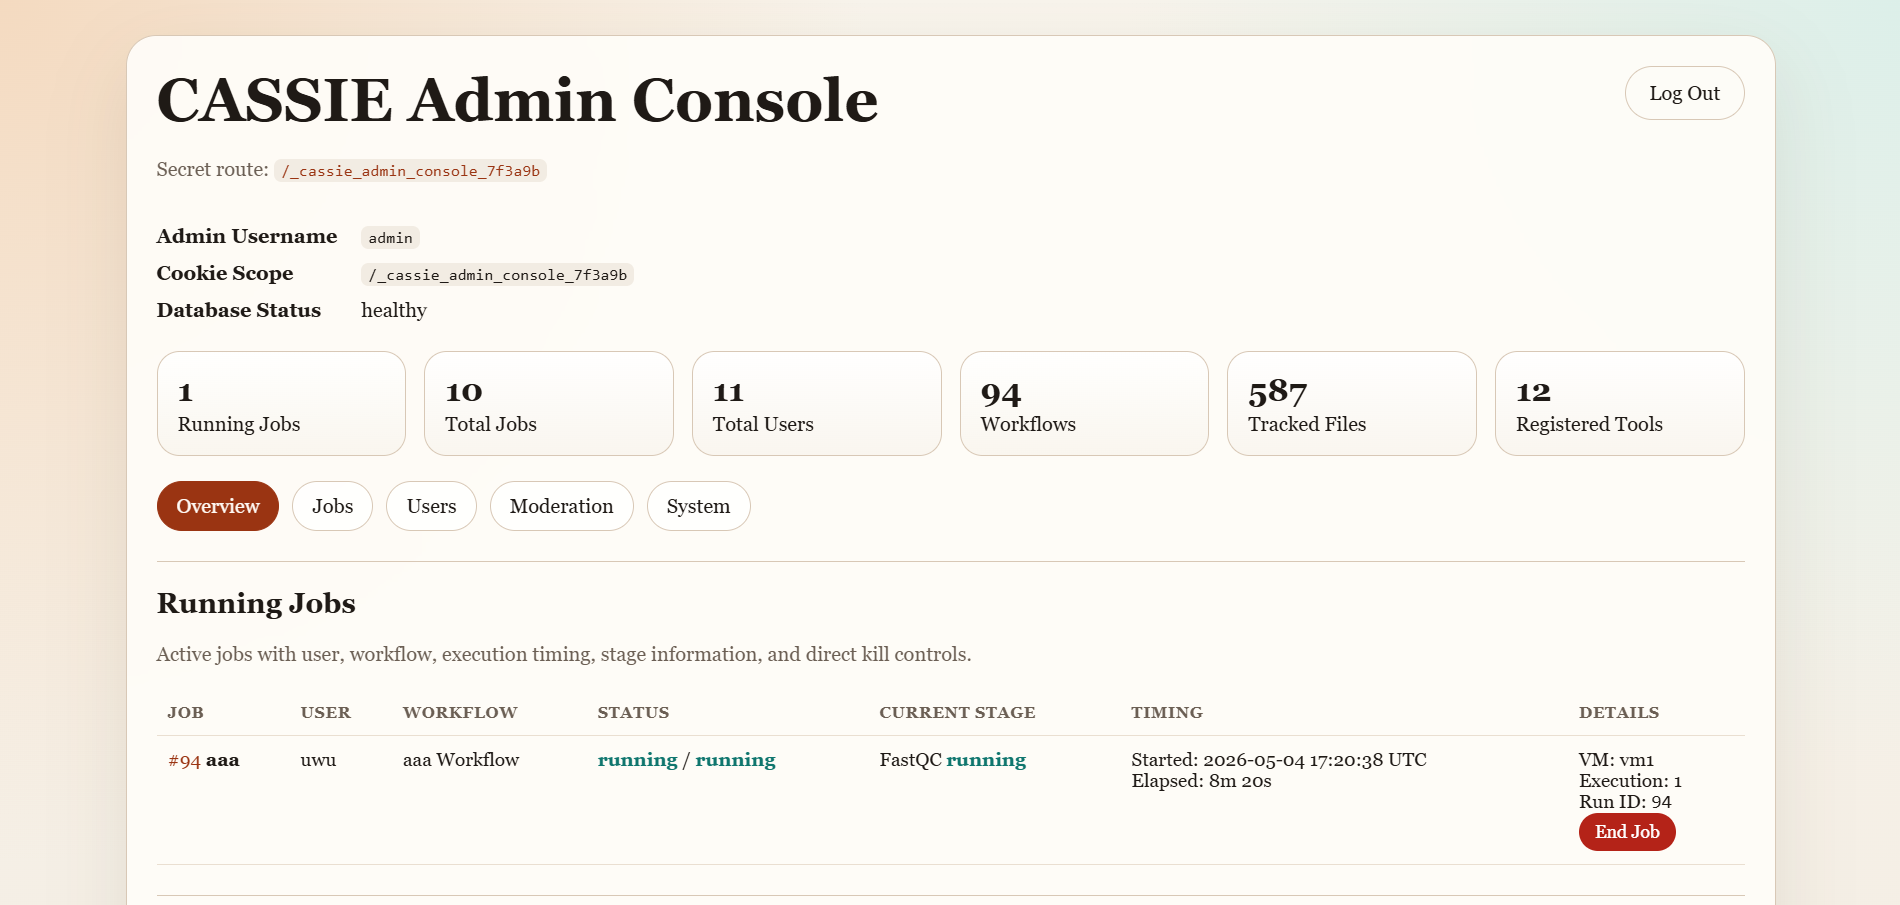
Admin Panel (Admin Users Only)
If your account has administrator privileges, you can access the dedicated admin console. The Admin Panel
provides access to operational controls such as:
System Health: Server status, queue depth, and resource usage.
User Management: Viewing, disabling, or promoting user accounts.
Queue Monitor: Inspecting running and pending jobs across users and taking corrective actions when needed.
Configuration: Reviewing administrative settings exposed in the console.
Overview of the CASSIE admin console.
Section 10
Supported Bioinformatics Tools
CASSIE currently supports the following tools. Each tool displays its own required inputs and parameter
fields when selected.
Tool
Purpose
FastQC
Read quality control and QC reports
GenomeScope2
Genome size and heterozygosity estimation
SPAdes
Short-read genome assembly
metaSPAdes
Metagenomic assembly
Hifiasm
HiFi long-read genome assembly
Verkko
Long-read telomere-to-telomere assembly
QUAST
Assembly quality assessment
BUSCO
Genome completeness evaluation
CAT
Taxonomic classification of contigs
Liftoff
Annotation liftover between assemblies
Meryl
K-mer database construction
Merqury
Reference-free assembly evaluation
Section 11
Tips and Troubleshooting
Job stays queued for a long time
The compute cluster may be at capacity. Wait a few minutes and refresh the job detail page.
Administrators can also inspect queue status from the Admin Panel.
File upload fails
Make sure the file is in a supported format and is not corrupted. Very large uploads may require
a more stable connection.
Tool parameter errors
Review the tooltip text beside each parameter. Leaving a field blank usually applies the default value.
Pipeline node will not connect
Connections are type-checked. Make sure you are dragging from the correct output handle to a compatible input handle.
Published pipeline does not appear immediately
Refresh the Pipelines page and switch back to the Community tab after a short delay.
For further help, post a question in the Community Forum or contact your system administrator.